Transforming Photos with the Sketchy Pencil Photoshop Action
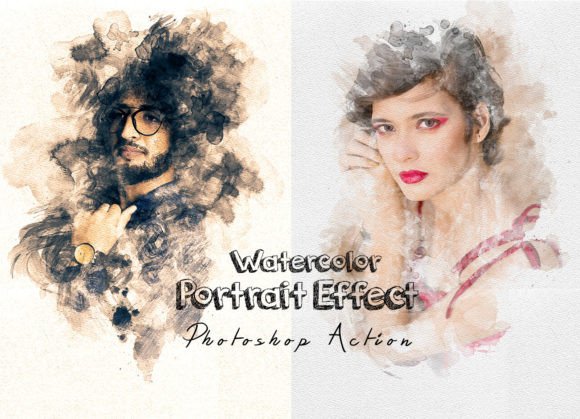
In the evolving world of digital art and photography, the line between a standard photograph and a hand-drawn masterpiece is becoming increasingly blurred. For photographers, graphic designers, and digital artists, the ability to quickly convert high-resolution images into artistic sketches can save hours of manual labor while opening up new creative possibilities. This is where the Sketchy Pencil Photoshop Action becomes an indispensable tool in your creative arsenal. It is not merely a filter; it is a sophisticated automated workflow designed to enhance images, adding beauty and unique character that resonates with viewers.
The demand for distinctive visual content is higher than ever. Whether you are creating social media graphics, designing book covers, or simply looking to give personal photos a unique aesthetic, achieving a realistic pencil sketch effect manually requires advanced knowledge of layer masks, blending modes, and brush dynamics. The Sketchy Pencil Photoshop Action simplifies this complex process, allowing users of all skill levels to produce stunning, professional-grade results with just a few clicks. By automating the tedious technical steps, this tool allows you to focus on the artistic outcome rather than the mechanical execution.
Why Choose an Automated Sketch Effect?
Many creatives struggle with the time-consuming nature of manual digital painting. Creating a believable sketch involves analyzing light and shadow, selecting appropriate brush textures, and carefully masking areas to maintain depth. Without extensive experience, manual attempts often look flat or artificial. The Sketchy Pencil Photoshop Action addresses these challenges by utilizing pre-configured algorithms that analyze the tonal range of your image and apply corresponding pencil strokes intelligently.
This action is perfect for photographers and designers who need consistency and speed. It enhances images by adding texture and depth, transforming ordinary snapshots into awesome, unique looks. One of the standout features of this specific action is its versatility. It includes ten different color options, allowing you to experiment with various moods and styles without starting from scratch. When you open the unviewed eyes of your creativity, these color variations provide immediate inspiration, helping you discover aesthetics you might not have considered otherwise.
Compatibility and Technical Requirements
Before diving into the creative process, it is essential to ensure that your software environment is compatible with the tool. The Sketchy Pencil Photoshop Action has been rigorously tested to ensure stability and high-quality output across a wide range of Adobe Photoshop versions. It is fully supported on Photoshop CS6, CC2014, CC2015, CC2015.5, CC2016, CC2017, CC2018, CC2019, CC2020, CC2021, and the latest CC2022 English Version. This broad compatibility ensures that whether you are using an older workstation or the latest creative cloud suite, you can integrate this action into your workflow seamlessly.
However, to achieve the best possible results, there is a critical preparatory step that users must follow. The action relies on specific canvas dimensions to calculate brush sizes and effect intensity accurately. Therefore, the most important instruction is to resize your image before running the action. To do this, select the Crop Tool from your toolbar. In the top menu bar, you will see three blank boxes labeled W (Width), H (Height), and Resolution. Enter 3000px for Width, 2000px for Height, and set the Resolution to 72. Once these values are entered, press the Enter button to apply the changes. This standardization ensures that the pencil strokes appear natural and proportional, regardless of the original image size.
Step-by-Step Implementation Guide
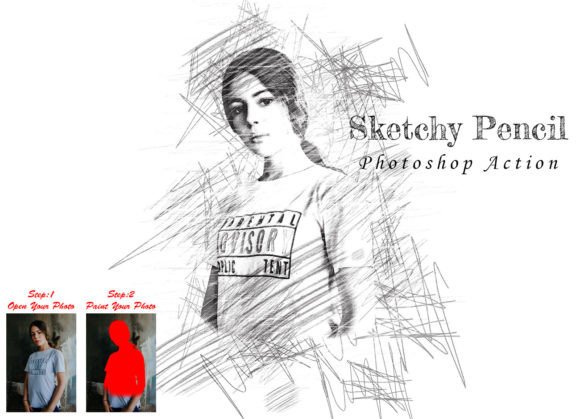
Using the Sketchy Pencil Photoshop Action is straightforward, but following the correct sequence is vital for the automation to work as intended. After resizing your image, open the photo you wish to transform. The next step involves a bit of user interaction that adds a personalized touch to the final result. Create a new layer and rename it “paint” in lowercase letters. This naming convention is crucial because the action script looks for this specific layer name to execute properly.
On this “paint” layer, select a brush and lightly paint over the areas of the image you want to emphasize or transform. This step allows you to guide the action, telling it where to focus its artistic energy. You do not need to be precise; broad strokes are sufficient. Once you have painted the desired areas, close the eye icon on the “paint” layer to hide it, but keep the layer selected. With the layer still selected, click the play button on the action panel. The script will now run, processing your image and applying the sketch effect based on your input and the built-in parameters.
What Is Included in the Package?
When you acquire the Sketchy Pencil Photoshop Action, you are not just getting a single file. The package is comprehensive, designed to support you throughout the learning curve. It includes the primary ATN file, which is the Photoshop Action itself, along with a set of custom brushes tailored to complement the sketch effect. As mentioned, there are ten color options included, providing a diverse palette for your projects.
To ensure you never feel stuck, the package comes with a detailed Help File and a PDF guide that explains every feature. Additionally, a video tutorial link is provided within the help file, offering visual learners a clear demonstration of the process. The action also features masking options, giving you further control over the final output. All layers are organized logically, making it easy to customize the result further if needed. This high level of organization ensures that even complex edits remain manageable.
Practical Applications for Different Users
The utility of the Sketchy Pencil Photoshop Action extends across various creative fields. For portrait photographers, it offers a way to create timeless, classic looks that mimic traditional charcoal or pencil portraits. Wedding photographers can use it to create unique save-the-date cards or album inserts that stand out from standard glossy prints. Graphic designers can leverage the ten color options to match brand identities or create eye-catching posters that blend photography with illustration.
Digital artists may use this action as a base layer for further painting. By generating a quick sketch foundation, they can save time on the initial layout and focus on coloring and detailing. Social media managers can use the action to create consistent, artistic content that breaks the monotony of standard feed images. Because the action works on every photo and delivers high-quality results, it is a reliable solution for batch processing or quick turnaround projects.
Maximizing Your Creative Output
To get the most out of this tool, experiment with the masking options and the custom brushes included. While the action provides an excellent starting point, adding your own adjustments to contrast or brightness before running the action can yield dramatically different results. Remember that the “paint” layer is your directive to the software; varying the opacity and density of your brush strokes on this layer will influence the intensity of the sketch effect.
The Sketchy Pencil Photoshop Action is more than just a shortcut; it is a bridge between photography and traditional art. By understanding the technical requirements, such as the specific resizing instructions and layer naming conventions, you can unlock its full potential. Whether you are a seasoned professional looking to streamline your workflow or a hobbyist eager to explore new artistic styles, this action provides the tools you need to create unique, awesome, and stunning images with ease and confidence.